How to Make Any Planter Self Watering
If you haven't gotten on the self-watering container gardening train, now is a great time to come aboard as it has never been easier. Using planters with built-in systems, hanging basket reservoirs, and window box reservoirs you can make every container a self-watering planter.
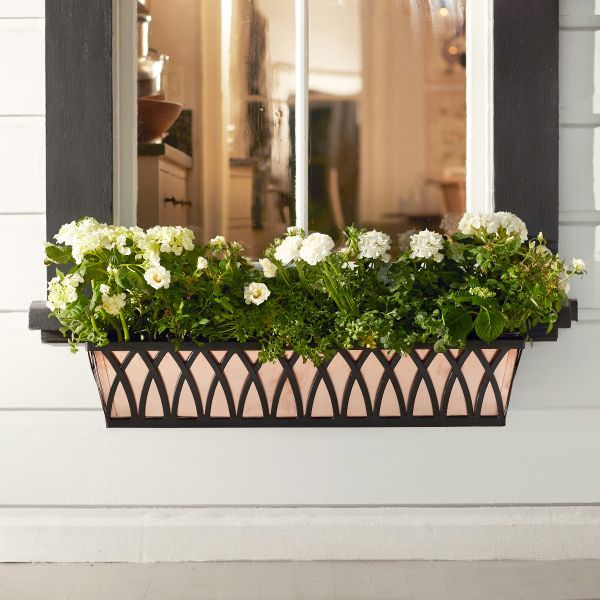
Self-watering planters are the perfect solution for anyone who wants effortless, beautiful blooms! And whether you prefer large window boxes, small porch planters, deep trough planter boxes, or impressive square outdoor planters, you can enjoy the benefits of a self-watering container. Some planters have built-in systems, but for those that don’t, self-watering reservoirs are incredibly easy to install!
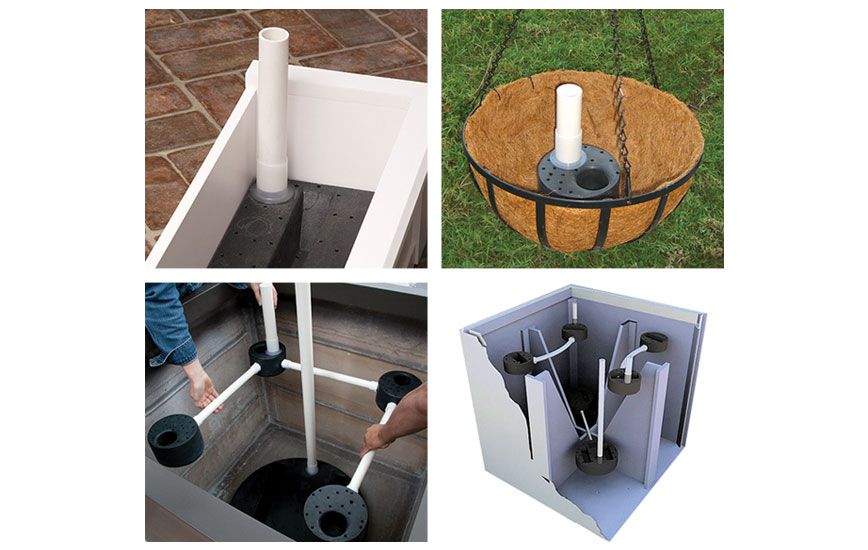
What is a planter reservoir?
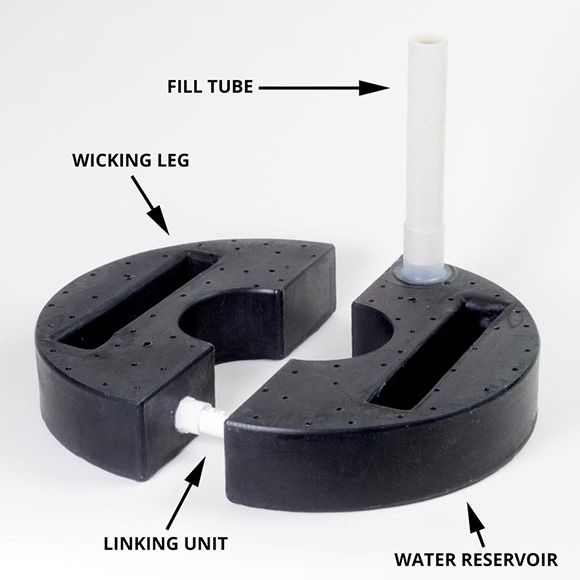
A planter reservoir is a storage container for water with features that allow for automatic watering. In many cases, they are plastic boxes or bowls with small holes on top. A fill tube on the edge of the system allows easy access for refilling the reservoir.
How do planter reservoirs work?
Using capillary action, the roots draw water up from the wicking leg in the reservoir. The holes on the top of reservoir provide air circulation to allow gravity to drain excess water from the plant's soil into the reservoir if it were to rain.
What are the benefits of a self-watering container?
1. Healthier plants: Not only are you far less likely to over- or under-water your plants, but you are allowing the plants to get water directly at the roots. This means less water splashed onto leaves, which may help prevent disease.
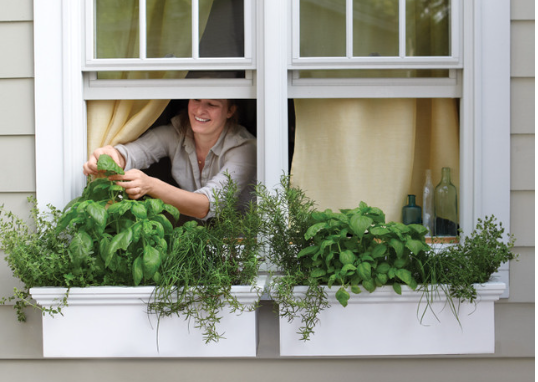
2. Easy gardening: Instead of watering your plant every single day (or multiple times per day in the summer!), you only need to refill your reservoir once every 1-2 weeks! This is particularly convenient for large window boxes, long tall planters, and big box planters that require a lot of water. This is also helpful for narrow flower boxes, as they tend to dry out quicker (since there is less soil to trap moisture).
Here’s what you will need:
• PVC Fill Tube (Provided by Windowbox.com with purchase of reservoir)
• Gravel (Optional for additional drainage) and filter fabric (Optional)
• PVC Adhesive (Available at any local hardware store)
• Hacksaw or PVC Cutter (Optional if you would like to cut down the height of your PVC Fill Tube)
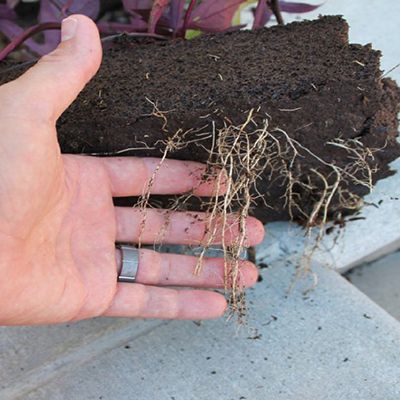
• Lightweight fibrous soil
• Plants
Step One:
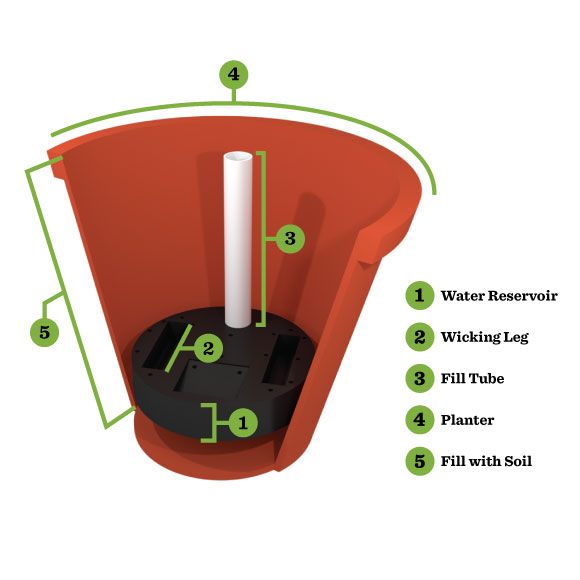
Place a thin layer of gravel at the bottom of the planter. This will provide emergency drainage in case of over watering. To prevent the soil from entering the gravel section, place the filter fabric cloth over the gravel. It is not necessary to use filter fabric but can be helpful if you do have drainage holes in your planter.
Step Two:
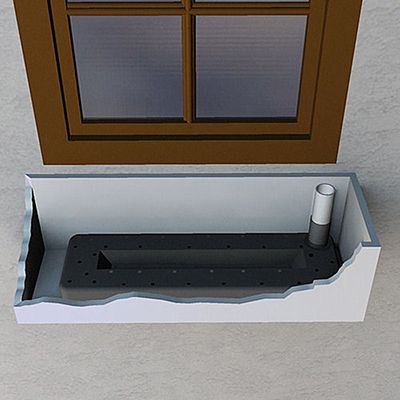
Place the planter reservoir into the bottom of the planter over the gravel.
Please note: The desired distance between the reservoir and the root ball of your plants should be between 2" and 10". The water in the reservoir will travel an average of 12" upwardly and 9" around. You want to be sure that your plant root zone is within the 12" zone of the reservoir otherwise it will not get enough water.
If you have a large planter, you will need to back fill underneath the reservoir to lift the reservoir up near to your root system if you are planting smaller plants. In this case, place 1" - 2" of soil over the gravel and then place the self-watering reservoir on the soil base.
For very large planters, connect multiple reservoirs with linking units.
Step Three:
Place a small amount of PVC adhesive to the outside of the fill tube before inserting it into the reservoir. Insert the 1 1/4" fill tube into the Planter Well Reservoir. The adhesive will help secure the fill tube in the reservoir in the event that someone tries to pull up on the fill tube. We recommend that you trim the fill tube so it is 1/2" to 1" above the top of the planter for easy refilling, but this is optional and based on personal preference.
Step Four:
Fill the planter with fibrous soil to the desired level. Tamp it down but do not pack the soil firmly. See soil tip below.
Step Five:
Add plants into the planter and add the rest of the soil around them. You can hide the fill tube with plants, if desired, but make sure you can easily pour water into it. Add water into fill tube until the Planter Well Reservoir is full. Once water is added, the soil will immediately start to draw the water up out of the reservoir. Just for the first watering, water soil thoroughly from the top.
Please note: If you are planting a window box, after you have filled the reservoir, wait for a time to see how moist the soil becomes. You may not need to water because the soil has taken up a sufficient amount of water. You can check by simply poking your finger approximately 1" into the soil if you don't own a moisture meter.
Step Six:
Replenish water in tank as required to maintain desired moisture level.
Please note: We recommend the use of a dip stick to measure the water level inside the reservoir.
Self-Watering Planter Tips:
Watering Tip:Watering times may vary depending on the environment. The reservoirs usually need to be refilled every 1-2 weeks. In some cases the reservoirs may need more frequent watering if you are in an extremely hot, arid climate and less frequent if you are in a moist, damp, cooler climate.
Remember that even if the reservoir is empty, the soil can still be very moist even if the top looks dry. Be careful not to over water.
Pest Tip: Since you will have sitting water in the reservoir, it is possible it will attract mosquitos. To prevent mosquitos from entering your reservoir, cover the fill tube with a waterproof cork or tape.
If you have edible plants growing in your container garden, pour a couple drops of cooking oil into the water to break the surface tension which discourages mosquitos from laying their eggs.
If you don't have edible plants in your containers, mosquito dunks are very effective and recommended as it will kill mosquito larva for up to 30 days.
Soil Tip: Windowbox.com recommends a lightweight, fibrous soil for use with self-watering reservoirs. This will assist the "capillary action" that draws water to the roots and help the distribution of moisture throughout the root zone. Avoid soil will too much sand or clay. Soilless potting mixtures with perlite, peat moss, and coco coir work well.
Why You Should Use a Planter Reservoir:
1. The most important reason you should use a planter reservoir is for the conservation of water. You won't have to worry about over or under watering your plants either!
2. Instead of watering from the top where soil will splash up onto the leaves causing interactions for the leaves that could be intolerable, the capillary action of the roots wicking water up from the reservoir, decreases the likelihood of diseases.
3. When you keep the reservoir filled, you're eliminating all guesswork in knowing how much water your plants will need. Your plants will wick up the amount of water they need making self-watering planters perfect for gardening beginners as well as master gardeners.